Install macOS Sequoia on Virtual Machine: Easy Installation
Imagine transforming your Windows PC into a sleek, cutting-edge Mac—without ever touching an Apple device. Sounds like a tech dream, right? Well, with the power of virtualization, that dream becomes reality. In this guide, we’re going to take you through a unique journey where your trusty old Windows PC will host the latest macOS Sequoia, giving you access to all the features of Apple’s newest OS.
Forget the hassle of buying new hardware; instead, we’ll show you how to install macOS Sequoia on a Virtual Machine. This step-by-step guide will be your gateway to a whole new world of possibilities.
Install macOS Sequoia on the Virtual Machine

Follow these steps for installing macOS Sequoia on a Virtual Machine (both VMware and VirtualBox).
Step1: System Requirements to run macOS Sequoia
Before diving into the installation of macOS Sequoia on a virtual machine, you need to ensure your system meets the necessary requirements for a smooth experience. Here’s what you’ll need:
– Enable Virtualization: Virtualization must be enabled in your BIOS/UEFI settings. This feature allows your system to run virtual machines efficiently, and it’s essential for running macOS Sequoia on VMware or VirtualBox.
– Download VMware or VirtualBox: Choose your preferred virtualization software. Both VMware and VirtualBox are popular options, with VMware offering more advanced features, while VirtualBox is free and open-source. Ensure you download the latest version compatible with your operating system.
-Install VMware or VirtualBox: After downloading the application, now you will do the installation on your PC. Double-click on the .exe file and do the installation by following the prompt on your screen.
– Download Phyton from Microsoft Store: Now you are going to download and install the phyton language from Microsoft Store and do the installation on your Windows.
– VMware Unlocker: If you opt for VMware, you’ll need to install VMware Unlocker. This tool unlocks the ability to run macOS on VMware, which is otherwise restricted. It’s crucial for setting up macOS Sequoia on a VMware virtual machine. Do the installation and continue to the next step.
– Adequate Hardware: Your PC should have at least 8GB of RAM, a multi-core processor, and a minimum of 80GB of free storage space. The more resources your system has, the better the performance of your virtual machine.
– macOS Sequoia ISO/DMG File: Download the appropriate macOS Sequoia installation file (ISO for VMware/VirtualBox or DMG for native installations). In the next section, you’ll find direct download links to get these files.
Meeting these requirements ensures that your installation process will be smooth and that macOS Sequoia will run efficiently on your virtual machine.
Step 2: Downloading macOS Sequoia
Downloading macOS Sequoia is one of the important steps for you to experience macOS Sequoia. But with several versions available—ISO, DMG, and others—you might be wondering which one to choose. The answer largely depends on how you plan to use macOS Sequoia.
– macOS Sequoia ISO files are ideal for virtual machines, making them perfect if you’re planning to install macOS Sequoia on VMware or VirtualBox. This format is widely supported and easy to use for virtualization purposes.
– macOS Sequoia DMG files are the native disk image format used by macOS. If you’re installing macOS Sequoia on a Mac, or if you’re creating a bootable USB installer, this is the format you’ll need.
– Other formats, such as VMDK, might be useful for specific virtual environments or advanced setups.
Click on the link above to download macOS Sequoia in DMG or ISO from direct links.
Step 3: Configure VM Settings for macOS Sequoia
Once you’ve met the system requirements & downloaded macOS Sequoia, the next step is configuring your virtual machine (VM) settings to ensure macOS Sequoia runs smoothly. Whether you’re using VMware or VirtualBox, the process is quite similar with a few variations:
1. Create a New Virtual Machine

- In VMware, select Create a New Virtual Machine, and in VirtualBox, click on New.
- Choose a custom installation for more control over the configuration.
2. Assign Operating System Type
- Select Apple Mac OS X as the guest operating system.
- For the version, choose macOS 14 or the closest available version in the list.
3. Name Your Virtual Machine

Give your virtual machine a name, preferably something that identifies it as a macOS Sequoia installation.
4. Allocate Processor Cores

Assign at least 2 processors with 2 cores each (4 cores total) to the virtual machine. More cores will provide better performance.
5. Allocate RAM
Allocate at least 4GB of RAM to the virtual machine, though 8GB or more is recommended for a smoother experience.
6. Set Up Virtual Hard Disk
Create a new virtual hard disk and allocate a minimum of 80GB of storage.
For VMware, select Store Virtual Disk as a Single File, while in VirtualBox, choose VDI as the hard disk file type and Dynamically Allocated for storage.
7. Attach the macOS Sequoia ISO/DMG

Under the CD/DVD (SATA) settings, attach the macOS Sequoia ISO file you downloaded earlier. In VMware, this is done by selecting Use ISO Image File. In VirtualBox, you’ll choose the ISO under the Storage settings.
8. Configure Display Settings
Increase the video memory to the maximum available setting to ensure the best graphics performance. Enable 3D acceleration if your hardware supports it.
9. Network Settings
For networking, it’s generally best to leave the default settings, which typically work well for most configurations. If needed, you can configure the network adapter to bridge with your physical network.
10. Additional Settings
In VMware, use the VMX file to insert the line `smc.version = “0”` which is essential for the macOS installation to proceed.
In VirtualBox, you might need to tweak some settings under System or Acceleration to ensure compatibility with macOS.
Once these settings are configured, you’re ready to start the VM and proceed with the installation of macOS Sequoia.
Step 4: Install macOS Sequoia on Virtual Machine
With your virtual machine configured, it’s time to install macOS Sequoia. Here’s how you are going to do it:
1. Start the Virtual Machine
In VMware, click on Power on this virtual machine whereas, in VirtualBox, select your macOS Sequoia VM and click Start.
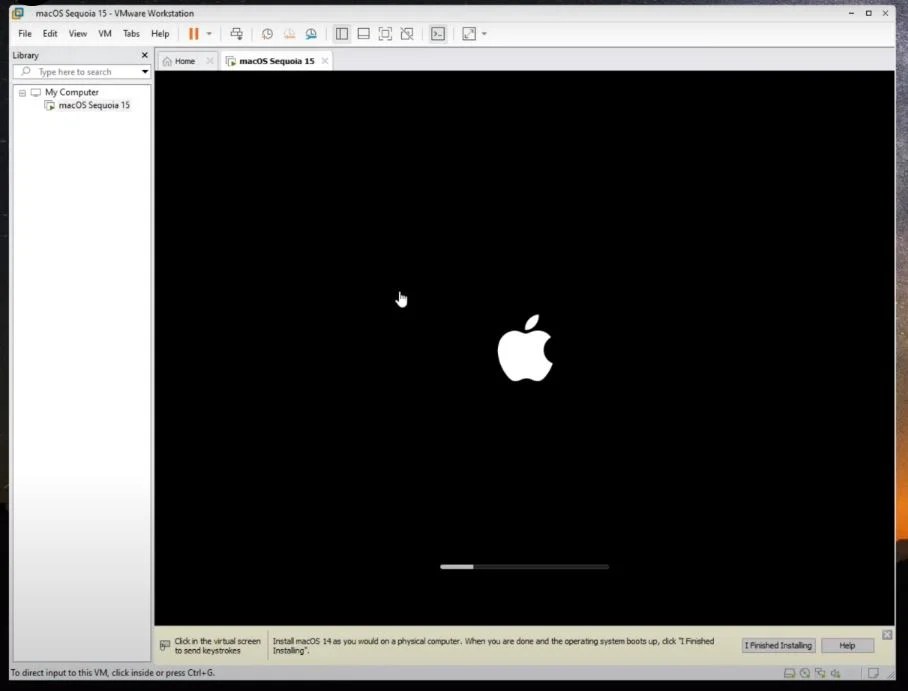
2. Boot from the macOS Sequoia ISO
The VM should boot from the ISO file attached to the CD/DVD drive. Here you’ll see the macOS installer loading. This might take a few minutes, depending on your system’s performance.
3. Select Language
Once the installer loads, select your preferred language and click on the forward arrow to continue.
4. Disk Utility Setup
Before installing macOS, you need to format the virtual hard disk you created.
- Choose Disk Utility from the list of options and click Continue.
- Select the VMware Virtual SATA Hard Drive (or the equivalent in VirtualBox) and click Erase.
- Name the disk (e.g., “macOS Sequoia”), choose APFS as the format, and GUID Partition Map as the scheme.
Once the disk is erased, close Disk Utility to return to the installer.
5. Install macOS Sequoia
With the virtual hard disk prepared, select Install macOS from the options and click Continue.
Agree to the terms and conditions, then select the disk you just formatted as the installation destination. Click Install to begin the installation process.
The installation will take some time, typically around 30 to 60 minutes, depending on your system. The virtual machine may restart multiple times during this process.
Be patient and let the process complete. If the VM appears to hang, give it time; it’s often working in the background.
6. Initial Setup
After the installation is complete, the VM will boot into macOS Sequoia.
- You’ll be prompted to complete the initial setup, which includes selecting your region, setting up a user account, and configuring various preferences.
- You can choose to set up your Apple ID, enable location services, and select your preferred look (Light, Dark, or Auto).
Once you’ve gone through the setup process, you’ll be taken to the macOS Sequoia desktop.
Your macOS Sequoia installation is now complete, and you can start using it just like a regular macOS system.
Related: Download macOS Sequoia Wallpaper
Related: Install macOS Sonoma on VMware
Related: Install macOS Sonoma on VirtualBox


